Fellipe Sanches' website

Author: F. Sanches

  • Lesson 01 — What Does a Security Engineer Actually Do? (Practical Lab)

    WEEK 01 · LESSON 01 · 45–60 MINUTES · ESSENTIAL + PROFESSIONAL CHALLENGE

    ← Back to the 12-week roadmap · Leia em português

    Security engineering is not about memorizing tools or trying to hack everything. It is about making systems safer by design, deciding which risks matter, implementing controls, and proving that those controls work. Today you will act as the security engineer for a fictional small SaaS product.

    Your deliverable: a one-page security review containing a system diagram, three risks, three controls, and a way to verify each control. Keep it: it is the first artifact in your learning portfolio.

    1. What will you be able to do?

    • Explain the difference between an asset, threat, vulnerability, risk, and security control.
    • Describe what a security engineer actually delivers to a business.
    • Turn a vague concern into a testable technical requirement.
    • Prioritize a few practical improvements instead of making an endless tool checklist.

    2. A security engineer’s mindset

    Ask four questions in order: What matters? What could go wrong? What can reduce the risk? How will we know it works?

    Asset: something valuable, such as customer information or service availability. Threat: a possible cause of harm. Vulnerability: a weakness that can be exploited or trigger failure. Risk: the combination of a harmful scenario, its likelihood, and its impact. Control: a measure designed to reduce that risk, such as access checks, MFA, monitoring, or tested backups.

    The NIST Cybersecurity Framework 2.0 organizes cybersecurity work into six complementary functions:

    • Govern: decide ownership, objectives, and acceptable risk.
    • Identify: inventory important systems, data, and dependencies.
    • Protect: use safeguards such as least privilege and encryption.
    • Detect: observe suspicious or unexpected activity.
    • Respond: contain and investigate incidents.
    • Recover: restore services and learn from failures.

    One job title does not have to own every function. Security engineers often collaborate with developers, cloud engineers, infrastructure teams, and incident responders. A good deliverable is a working protection with evidence—not merely a recommendation slide.

    3. Your fictional company: OrderDesk

    OrderDesk helps small businesses collect customer orders. It has a website, a backend API, a PostgreSQL database, and object storage for attachments. Each merchant signs in to see only their own orders. Administrators manage the service. Customer records include names, phone numbers, and delivery details.

    During an initial review you hear three worrying statements:

    1. “Order IDs are sequential, and I am not sure the API checks which merchant owns each order.”
    2. “Admins use passwords, but we have not enabled MFA or reviewed failed-login alerts.”
    3. “The database is backed up nightly. Nobody remembers the last restoration test.”

    These are hypotheses to investigate, not confirmed incidents. A security engineer turns each into a concrete check, a decision, and an improvement.

    4. Hands-on lab — create a one-page security review (30 minutes)

    Step A — Draw the system (5 minutes)

    On paper or in a diagram tool, draw: Customer browser → Web app/API → PostgreSQL, plus API → object storage. Mark the boundary between a merchant’s account and another merchant’s data. Mark where administrators sign in. No accounts or paid tools are required.

    Step B — Fill your risk register (10 minutes)

    Use this table as a starting point. Copy it to a note and improve it in your own words:

    AssetWhat could go wrong?ControlProof it works
    Merchant ordersMerchant A reads merchant B’s recordsServer-side authorization on every order requestWith synthetic test accounts, A cannot access B’s order (403/404)
    Admin accountsStolen password grants privileged accessMFA, least privilege, login monitoringTest admin MFA and alerting with test accounts
    Orders databaseDeletion or outage causes prolonged data lossProtected backups and a recovery planRestore into an isolated environment and check records

    Step C — Choose priorities (10 minutes)

    For each risk, record impact (low/medium/high), likelihood (low/medium/high), and what you still do not know. Choose your top three actions. Explain why each deserves attention before selecting a product or vendor. These are qualitative judgments, not a precise risk formula.

    Step D — Write acceptance criteria (5 minutes)

    Transform your highest-priority risk into a testable task. Example: “When merchant A is authenticated, requesting an order belonging to merchant B must never disclose B’s order data; the API must enforce authorization regardless of UI behavior.” Define how you would verify it on accounts and data you control.

    5. Test your decisions

    Try the questions below before revealing their answers. Getting one wrong is useful: explain what assumption you made.

    Question 1 — Merchant A can read merchant B’s order. Is hiding B’s order link in the UI enough?

    No. Browser UI restrictions are not authorization. The API must check the authenticated merchant against the owner of every requested order. Verify with two synthetic accounts and a negative test.

    Question 2 — Nightly backups are running. Does that prove OrderDesk can recover from data loss?

    No. A successful backup job is only one piece of evidence. Restore a copy into an isolated test environment, verify data integrity and measure how long recovery takes.

    Question 3 — Which is a stronger deliverable: “Enable MFA” or “Admin MFA is enforced and verified”?

    The second. A verified control has an owner, a test, and evidence. “Enable MFA” alone could remain an unimplemented recommendation. Security engineering is about measurable outcomes.

    6. Professional challenge (optional, 20 minutes)

    If you develop software, implement one small automated negative authorization test in a local project you own: create two synthetic merchants and an order for merchant B; authenticate as A; request B’s order; assert that no sensitive data is returned and the response is 403 or 404. Also test the list and update endpoints where relevant. Never test other people’s applications without authorization.

    If you are not coding yet, write the three test cases in plain language. A well-designed test is still valuable engineering work.

    7. Check your deliverable

    • ☐ I drew the components and at least one trust boundary.
    • ☐ I identified three valuable assets and plausible failure scenarios.
    • ☐ I chose controls with clear owners and priorities.
    • ☐ Every control has a way to verify its effectiveness.
    • ☐ I can explain my most important decision in two sentences.

    Self-assessment: 5/5 means you completed the lesson; fewer than 5 means revise the missing items. Save your diagram and risk register as lesson-01-security-review in your notes or portfolio. Do not publish production data, credentials, or internal architecture details.

    8. Learn the culture

    Read the introduction to OWASP Top 10:2025 — Broken Access Control and the NIST NICE Framework. Notice the difference between knowing a vulnerability name and being responsible for a measurable security improvement.

    Reflection: What would you protect first in OrderDesk, and what evidence would convince you that your change worked? Write a three-sentence answer. Next: Lesson 02 — Confidentiality, Integrity, and Availability in Real Systems.

  • Why Does My Browser Still Show an SSL Error After I Fix the Certificate?

    Security Explained · 3-minute read

    Leia em português

    You install a valid TLS certificate on your server, open the browser tab that showed “Your connection is not private,” and… the warning is still there. Is the new certificate broken? Not necessarily.

    The key: the browser is showing the result of an earlier attempt

    To open an HTTPS website, your browser establishes a TLS connection and checks the certificate presented by the server. If validation fails, it displays a warning. That warning page is a snapshot of that connection attempt—it does not receive an instant notification when someone changes the certificate on the server.

    The fix may already be live, but the old warning can stay visible until you reload. A reload triggers a new connection attempt and lets the browser evaluate the certificate currently being served.

    Follow the sequence

    1. 10:00: Browser requests https://example.com. The server presents an expired certificate. Browser shows a privacy warning.
    2. 10:02: Administrator installs a valid certificate and applies the web-server configuration.
    3. 10:03: The old browser tab still displays its warning. Nothing has told that screen to redraw itself.
    4. 10:04: You reload the page. A fresh TLS connection validates the updated certificate; the site may load normally.

    Important nuance: on the tab where certificate validation failed, the original handshake was not a successfully trusted HTTPS connection. So this is not usually a case of a bad connection being “cached.”

    Quick interactive check

    Try it: The certificate was replaced, but your warning tab is still open. What should you do first?

    Reload the page to start a fresh TLS validation. If the error persists, inspect the certificate actually served by the hostname and any CDN or reverse proxy in front of it.

    Challenge: You reloaded but still see a warning. Is clearing the HTTP cache the best first step?

    No. First identify which certificate is actually being served and by which endpoint. The old cert may still be active on the web server, reverse proxy, load balancer or CDN. HTTP cache is not normally the explanation for a live TLS certificate validation error.

    If reloading does not fix it

    • Verify the hostname matches the certificate (including www, if used).
    • Verify the web server actually serves the new certificate and has reloaded its configuration.
    • Check proxies, load balancers and CDN edges: TLS may terminate before the request reaches your server.
    • Check expiration, certificate chain and local device date/time.

    Takeaway: certificate deployment is a server-side change; a browser tab showing an earlier TLS failure is not a live status dashboard.

    References: RFC 8446 — TLS 1.3; MDN — Transport Layer Security; Cloudflare — SSL errors.

  • Security Engineering: A Practical 12-Week Learning Roadmap

    Security is not just about finding vulnerabilities. It is about designing systems that reduce risk, implementing effective defenses, detecting unusual behavior, and responding when something goes wrong.

    Leia em português

    This free series explains how that work happens—one practical lesson at a time. Our goal is to build a strong foundation in security engineering and apply it to realistic technical problems.

    Who is this learning path for?

    • People beginning their journey in cybersecurity.
    • Software developers who want to build more secure applications.
    • IT, network, and Linux professionals moving toward security roles.
    • Cloud engineers seeking stronger security design skills.

    You do not need a security job title to start. We explain the essentials before offering more advanced challenges.

    What does a security engineer do?

    A security engineer helps protect applications, infrastructure, identities, services, and data. Four questions guide the work:

    1. What are we protecting? Identify the assets and their importance.
    2. What could go wrong? Consider threats, mistakes, and failure scenarios.
    3. How can we reduce the risk? Design controls such as least privilege, segmentation, encryption, monitoring, and tested backups.
    4. How do we verify the defenses? Use tests, logs, reviews, and incident exercises.

    Security engineering overlaps with Cloud Security, Application Security, Network Security, and DevSecOps. We will discover how these areas connect rather than treat them as isolated careers.

    The 12-week learning roadmap

    1. Week 01 — Security Fundamentals: confidentiality, integrity, availability, threats, risk, and defense in depth.
    2. Week 02 — Network Security: TCP/IP, DNS, TLS, firewalls, traffic analysis, and segmentation.
    3. Week 03 — Linux Security: permissions, SSH, logs, hardening, and monitoring.
    4. Week 04 — AWS Identity and Access: IAM policies, roles, temporary credentials, and least privilege.
    5. Week 05 — AWS Network Security: VPC, subnets, Security Groups, NACLs, and database isolation.
    6. Week 06 — Data Protection: S3, KMS, encryption, backups, and recovery checks.
    7. Week 07 — Application Security: OWASP risks, authentication, authorization, and secure coding.
    8. Week 08 — API Security: OAuth 2.0, input validation, SQL injection, XSS, and access control.
    9. Week 09 — Container Security: Docker images, permissions, vulnerabilities, and isolation.
    10. Week 10 — DevSecOps: CI/CD, secrets, dependency scanning, and infrastructure as code.
    11. Week 11 — Detection and Response: logging, CloudTrail, alert triage, and incident investigation.
    12. Week 12 — Final Project: review and harden a small application and its infrastructure.

    Each week includes five short sessions. The last one focuses on review and practice. The schedule is a guide, not a race.

    How each lesson works

    • 10 minutes — Concept: understand the vocabulary and why a control exists.
    • 20 minutes — Practice: inspect a configuration, solve a scenario, or work in a safe lab.
    • 10 minutes — Reflection: explain the risk, your decision, and how to verify the result.

    Every lesson has two tracks: Essential, with simple explanations and a guided exercise, and Professional Challenge, with a more realistic engineering problem. Interactive questions and small simulations will help you test your understanding.

    Learn the culture, not just the tools

    Security changes constantly. Follow technical write-ups, incident reports, official documentation, and local communities. Explore the AWS Security Blog, the OWASP Top 10, the CISA Known Exploited Vulnerabilities catalog, and the OWASP São Paulo chapter.

    Practice only in systems you own or in deliberately vulnerable training environments, such as PortSwigger Web Security Academy and OWASP Juice Shop. Never probe third-party systems without authorization.

    What will you gain?

    By the end, you should have stronger technical vocabulary, hands-on experience with common security controls, a documented set of exercises, and a small final project. Twelve weeks are not a promise of mastery or employment; they are a structured foundation for continued learning.

    Warm-up challenge: Is a system secure just because it has a firewall? Reveal the answer.

    No. A firewall is one control, not a security guarantee. You also need to understand the assets and threats, manage identities and permissions, patch software, protect data, monitor behavior, and prepare to respond to incidents. In the next lesson, we will turn that mindset into a concrete exercise.

    Next lesson

    Lesson 01 — What Does a Security Engineer Actually Do? We will explore the engineer’s mindset and ask what it really means for a system to be secure.

    Start Lesson 01 — Practical Security Review →

    Core references

  • && instead of and, || instead of or?

    You can use AND/OR, but…

    Let’s get straight to the short answer: PHP supports AND/OR instead of &&/||, but because they have lower precedence, they can cause incorrect wait behavior.

    What is Lower precedence?

    Lower precedence is the same as “lower priority”; in this context, we are talking about the order in which an operator is evaluated after other operators in the same expression.

    In other words:
    When PHP reads a line of code with multiple operators, it decides which parts to calculate first based on operator precedence.

    Let’s look at some examples below to clarify the concept.

    Using && / ||

    $a = true;
    $b = false;
    $c = false;
    
    //waited expression
    $res = ($a && $b) || $c;
    //typed expression (it's the same above)
    $res = $a && $b || $c;
    
    
    //practical example
    if($res) {
      echo 'it\'s true';
    }
    else {
      echo 'it\'s false';
    }
    
    //output: it's false

    That makes sense, since express says: if variables a and b are true, or if variable c is true, show “true”, otherwise show “false”.

    Using and / or

    $a = true;
    $b = false;
    $c = false;
    
    //waited expression
    $res = ($a and $b) or $c;
    //typed expression (it isn't the same above)
    $res = $a and $b or $c;
    
    
    //practical example
    if($res) {
      echo 'it\'s true';
    }
    else {
      echo 'it\'s false';
    }
    
    //output: it's true

    Due to and has very low  precedence in PHP, lower than the assignment operator =, so the expression is interpreted as:

    ($res = $a) and $b or $c;

    The rest of the expression, and $b or $c, is then evaluated and discarded because it is not assigned to anything. This logical operation uses the value of $a as its first operand (true).

  • The easiest way to install xdebug with Ubuntu

    Here’s a clean, American-blog-style rewrite:

    Setting up Xdebug isn’t always straightforward. Depending on your setup, you might need to wire it into your IDE or get it running inside a Docker container.

    So in this tutorial, we’ll walk through a simple, foolproof way to set up Xdebug on Ubuntu Linux.

    Instalation

    First of all, check your PHP version with php -v.

    php -v
    PHP 8.4.15 (cli) (built: Nov 20 2025 17:43:25) (NTS)
    Copyright (c) The PHP Group
    Built by Debian
    Zend Engine v4.4.15, Copyright (c) Zend Technologies
        with Zend OPcache v8.4.15, Copyright (c), by Zend Technologies
        with Xdebug v3.4.7, Copyright (c) 2002-2025, by Derick Rethans

    Ondřej Surý’s PPA

    Now, if you installed PHP from Ondřej Surý’s repository, which is always the most up-to-date, you can install xdebug with.

    Note that you need to change your xdebug version to match your PHP version.

    sudo apt-get install php8.4-xdebug

    Default PPA

    But, if you are using the standard version of PHP included with Ubuntu, which is usually outdated, simply run:

    sudo apt-get install php-xdebug

    Run the php -v again and you should see the Xdebug information on the last line:

    php -v
    PHP 8.4.15 (cli) (built: Nov 20 2025 17:43:25) (NTS)
    Copyright (c) The PHP Group
    Built by Debian
    Zend Engine v4.4.15, Copyright (c) Zend Technologies
        with Zend OPcache v8.4.15, Copyright (c), by Zend Technologies
        with Xdebug v3.4.7, Copyright (c) 2002-2025, by Derick Rethans

    Then, run the built-in web server and you will also see a warning:

    php -S 127.0.0.1:8000
    [Sat Nov 22 12:00:22 2025] PHP Warning:  JIT is incompatible with third party extensions that override zend_execute_ex(). JIT disabled. in Unknown on line 0
    [Sat Nov 22 12:00:22 2025] PHP 8.4.15 Development Server (http://127.0.0.1:8000) started

    This warning is normal when you’re using Xdebug on PHP 8.1+ (including 8.4).
    Nothing is broken… So, what this warning means?

    Xdebug overrides the internal zend_execute_ex()function, which the PHP Just-In-Time compiler (JIT) also needs, since both can’t run at the same time, PHP automatically disables JIT.

    This scenario, with no JIT and using Xdebug, is generally satisfactory for a development environment.

    Usage

    Step Debugging

    Xdebug’s step debugger allows you to interactively walk through your code to debug control flow and examine data structures.

    Configuring Step Debugging

    On the linux shell, run the command below to find the current php.ini file.

    php -i | grep "Loaded Configuration File"

    Output: Loaded Configuration File => /etc/php/8.4/cli/php.ini

    Then, change (or include) the setting to xdebug.mode=debug, in case of inclusion, you can put it at the bottom of the file.

    In setups where PHP/Xdebug and your IDE all run on the same host, this is all you need to configure on the PHP and Xdebug side. 

    Command Line Debug Client

    The command line debug client allows you to debug PHP scripts without having to set up an IDE. This might be useful if you don’t want to tie your xdebug to a specific IDE.

    A binary for Linux, macOS, and Windows is available on the Xdebug downloads page. Here I will use Linux (x86_64).

    In the project root folder:

    wget https://xdebug.org/files/binaries/dbgpClient
    chmod +x dbgpClient
    ./dbgpClient 
    #OUTPUT
    Xdebug Simple DBGp client (0.6.1)
    Copyright 2019-2024 by Derick Rethans
    
    Waiting for debug server to connect on port 9003.

    So if you haven’t already, start the built-in PHP server in a new command prompt:

    php -S 127.0.0.1:8000

    The Xdebug output will change to:

    #OUTPUT
    Connect from 127.0.0.1:37386
    DBGp/1.0: Xdebug 3.4.7 — For PHP 8.4.15
    Debugging file:///home/fellipe/projects/symfony/my-clone-of-symfony-gs/index.php (ID: 294841/YOUR-NAME)
    (cmd)  

    If PHP/Xdebug run on a different machine, virtual host, or in a Docker container, you need to tell Xdebug where to make the debugging connection to.

    Configuriing Xdebug to connect with a PHPStorm

    ./dbgpClient
    Xdebug Simple DBGp client (0.6.1)
    Copyright 2019-2024 by Derick Rethans

    Waiting for debug server to connect on port 9003.

  • Installing Composer the right way

    If you search online for ways to install Composer on Ubuntu, you’ll probably find suggestions like:

    sudo apt install composer

    It looks simple… but it’s actually one of the worst ways to install Composer.
    Here’s why:

    • It almost always installs an outdated version of Composer.
    • Composer adapts quickly to new PHP versions — Ubuntu packages don’t.
    • apt installs Composer system-wide, which requires sudo even though Composer doesn’t need root privileges.
    • You lose access to composer self-update, because you must wait until Ubuntu updates the package (which often never happens).

    So… let’s install Composer the right way.

    Install Composer in Your Project Root

    In the root of your project run:

    php -r "copy('https://getcomposer.org/installer', 'composer-setup.php');"
    php -r "if (hash_file('sha384', 'composer-setup.php') === 'c8b085408188070d5f52bcfe4ecfbee5f727afa458b2573b8eaaf77b3419b0bf2768dc67c86944da1544f06fa544fd47') { echo 'Installer verified'.PHP_EOL; } else { echo 'Installer corrupt'.PHP_EOL; unlink('composer-setup.php'); exit(1); }"
    php composer-setup.php
    php -r "unlink('composer-setup.php');"

    This installs Composer directly from the official source.

    At this point, Composer works, but only if you run: php composer.phar.

    Pretty annoying, right?

    Let’s make it easier.

    Create a Local Composer Command (Project Only)

    So, let’s improve this, putting a symlink to your project uses its own composer command.

    In the same folder where composer.phar is located, create a blank file named composer, and edit it:

    touch composer
    vim composer

    Add this content and save it.

    #!/usr/bin/env bash
    php "$(dirname "$0")/composer.phar" "$@"
    

    Back to the shell, make it executable:

    chmod +x composer

    Now your project has its own composer executable…

    s$ ls -l
    total 3416
    -rw-r--r--  1 fellipe fellipe     841 Nov 10 23:01 README.md
    -rwxr-xr-x  1 fellipe fellipe      61 Nov 21 11:38 composer
    -rw-r--r--  1 fellipe fellipe     315 Nov 10 20:27 composer.json
    -rw-r--r--  1 fellipe fellipe  165048 Nov 10 20:27 composer.lock
    -rwxr-xr-x  1 fellipe fellipe 3281618 Nov 20 21:42 composer.phar
    drwxr-xr-x 10 fellipe fellipe    4096 Nov 20 19:46 vendor

    …and you can just run ./composer

    $ ./composer --version
    Composer version 2.9.2 2025-11-19 21:57:25
    PHP version 8.4.15 (/usr/bin/php8.4)

    Summary

    • You don’t put anything in $HOME/bin.
    • You don’t modify your global PATH.
    • You don’t need sudo.
    • You create a small wrapper script that works only inside this project.
    • You gain the flexibility to use different Composer versions per project, and you avoid any security risk from installing system-wide packages as root.

    Nice, right?

  • How to copy files between WSL Ubuntu instances

    It’s not always possible to update your Ubuntu version with just one command. In these cases, we need to set up a new server and migrate the files between them.

    In this tutorial we will see how to copy your projects from Ubuntu 20.04 to Ubuntu 24.04 under WSL.

    Listing your current WSL distros

    PowerShell
    wsl -l -v

    You will see something like this:

    PowerShell
    Ubuntu-20.04    Running   2

    Create the new Ubuntu distro

    In the Windows Command Prompt ou Powershell run the command below, and you will create a new Ubuntu WSL instance, without replace the current.

    PowerShell
    wsl --update
    wsl --install -d Ubuntu-24.04

    List the current WSL distros again with wsl -l -v , you should see both the newest instance now.

    PowerShell
    Ubuntu-20.04    Running   2
    Ubuntu-24.04    Stopped   2

    Copy files between instances

    Someone could copy the files between the WSL instances using a Windows command like robocopy, but this method would be extremely slow.

    Others might try copying the files from within the Linux instances, which could be more work than expected.

    Instead, we will copy the files directly inside the Windows Explorer, the simpliest way.

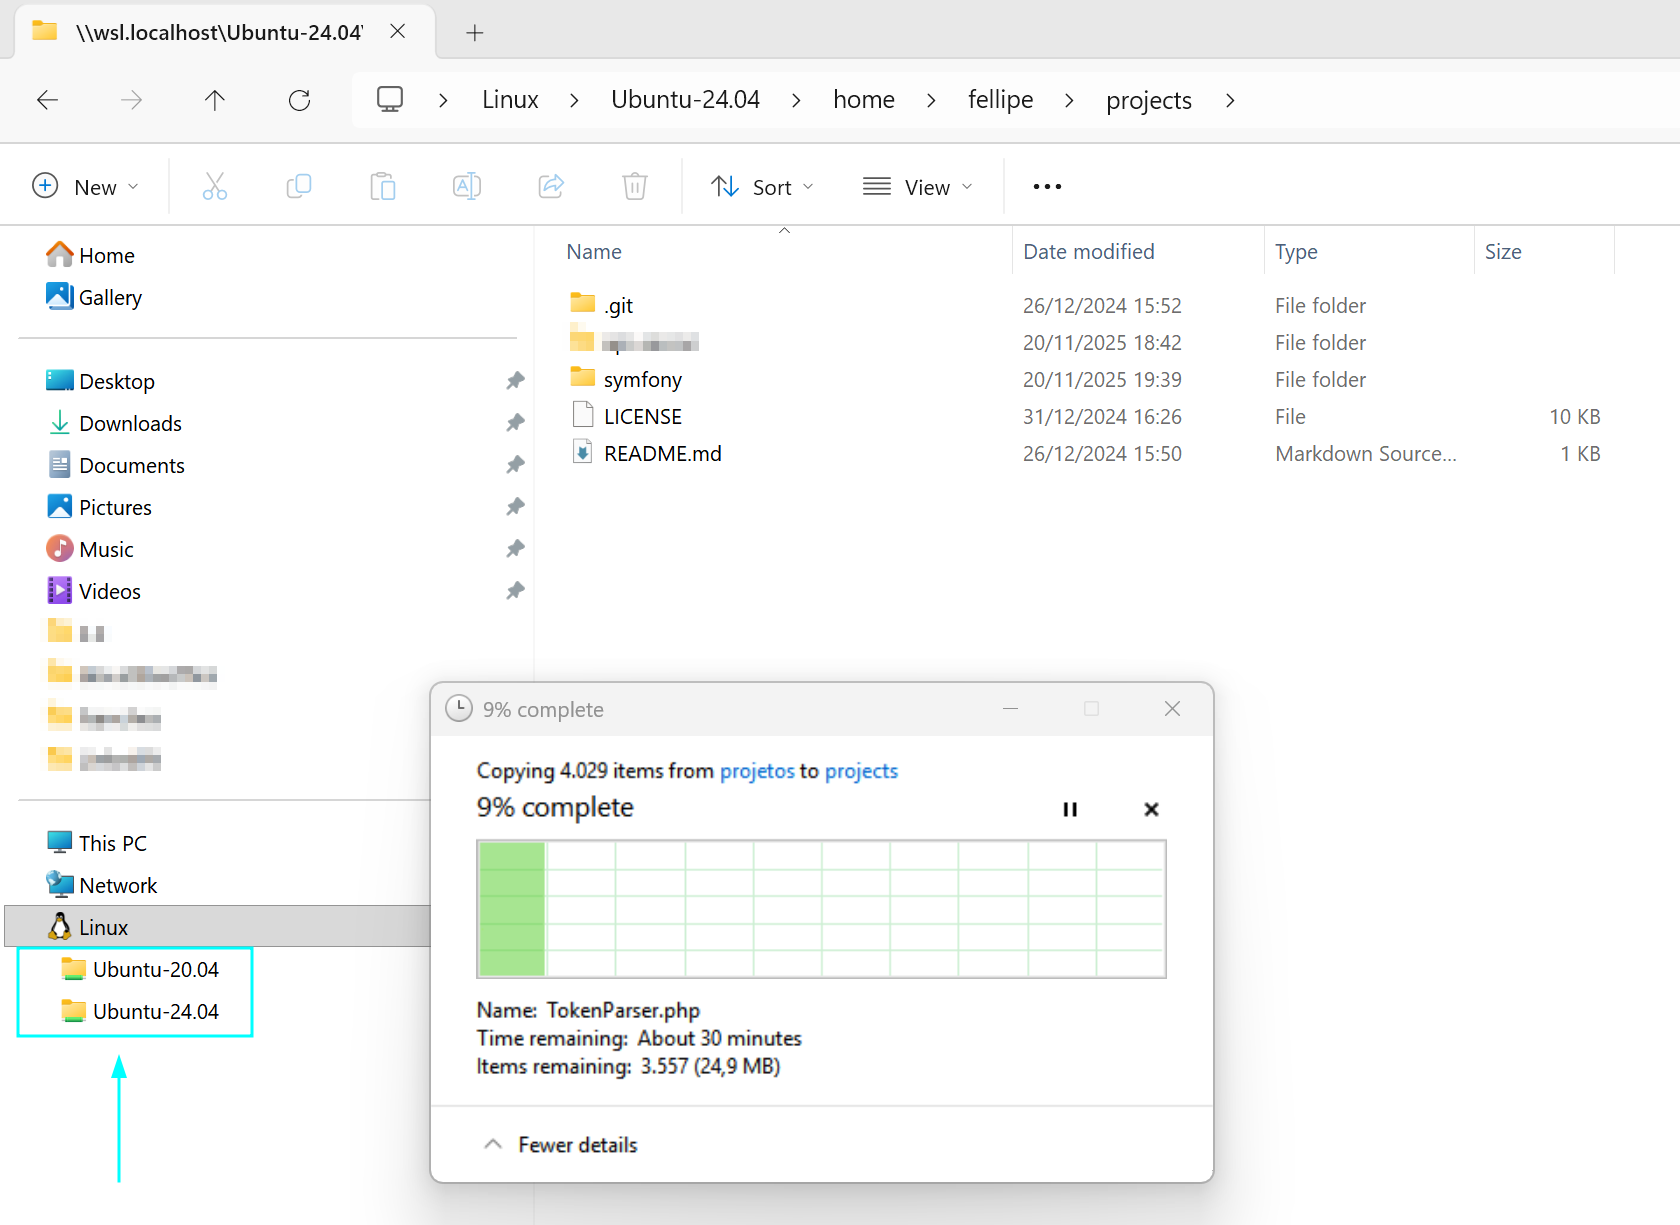
    In Windows Explorer, find the folder of both WSL, and just copy the files that you need from origin folder to destiny folder:

    Easy, no? But…

    The copies will be made. However, in the destination directory, we will have the Zone.Identifier files included; It is an NTFS Alternate Data Stream (ADS) automatically created by Windows.

    We don’t need them on our Linux system, so let’s remove them. Enter in the newest Linux created typint this in cmd or PowerShell:

    PowerShell
    wsl -d Ubuntu-24.04

    Go to the project directory:

    Bash
    cd ~/projects/
    sudo find . -type f -name '*:Zone.Identifier' -exec rm -f {} \;

    Okay, now we only have the same files from the old Ubuntu in the new Ubuntu.

    Finally, we now just need to adjust the permissions that are set for the root user to work on the files contained in /home/fellipe/projects which currently are granted to the root user. For it type:

    Bash
    sudo chown -R fellipe:fellipe /home/fellipe/projects

    Okay…

    Now you have your files on a new server, ready to be worked on.

    Remember, since you’re working from a new Ubuntu, the entire work environment will also need to be configured; things like the web server and PHP will need to be installed.

  • XDebug alternatives for debugging PHP

    Sometimes xdebug can be tricky to install and configure, especially in scenarios where it wasn’t designed to work natively, such as running your project in WSL or Docker.

    Today I will show you two simpler alternatives for debugging PHP, which will help you debug your project without wasting time on long installations.

    Pre-installation

    What we will use in this tutorial:

    • PHP 8.4
    • Composer 2.8

    Note: Since all versions of PHP 7 and Composer 1 are no longer supported, avoid using them.

    You can find a tutorial on how to update your PHP 7 to PHP 8 here, and a tutorial on how to install composer the right way here.

    To update your composer, you can simply run:

    ./composer self-update

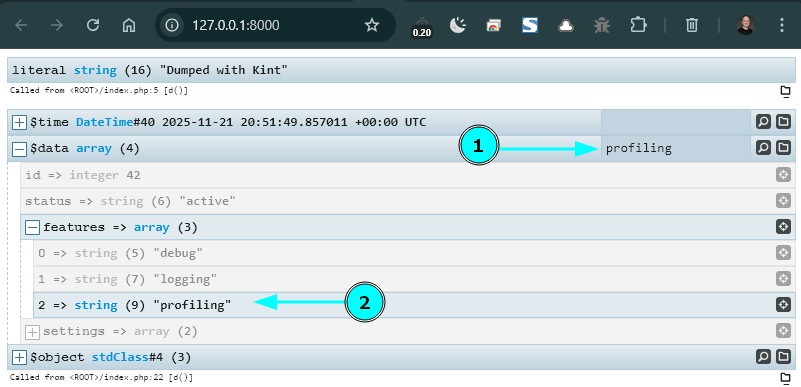
    Kint – Advanced PHP dumper

    🐈‍⬛ https://github.com/kint-php/kint

    The first debug tool is the Kint. Think of Kint as a smart evolution of a var_dump(), but much more complete and interactive.

    Instalation

    ./composer require kint-php/kint --dev

    Usage with Composer

    <?php
    
    include 'vendor/autoload.php';
    
    d('Dumped with Kint');
    
    $time = new DateTime();
    $data = [
        'id' => 42,
        'status' => 'active',
        'features' => ['debug', 'logging', 'profiling'],
        'settings' => [
            'theme' => 'dark',
            'notifications' => true
        ]
    ];
    $object = new stdClass();
    $object->title = "My Symfony Clone";
    $object->author = "Fellipe";
    $object->version = 1.0;
    
    d($time, $data, $object);

    Resources

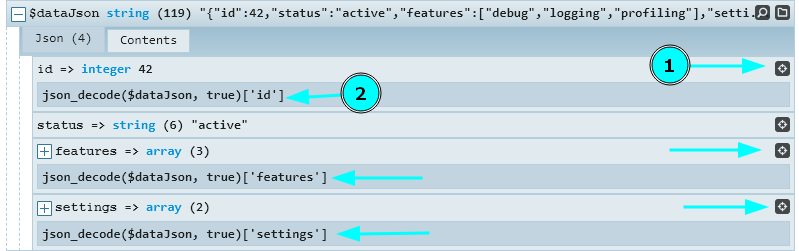
    • Live search – This feature let you to fint values through complex data with ease.
    • Dump Data – you can unfold and explore instantly arrays, jsons, php objects, etc.
    • Generates code – Kint generates the exact code you need to access specific fields.

    Kind have a lot of other nice features, you can see all them here: https://kint-php.github.io/kint/

    PHP Debug Bar

    🐈‍⬛ https://github.com/php-debugbar/php-debugbar

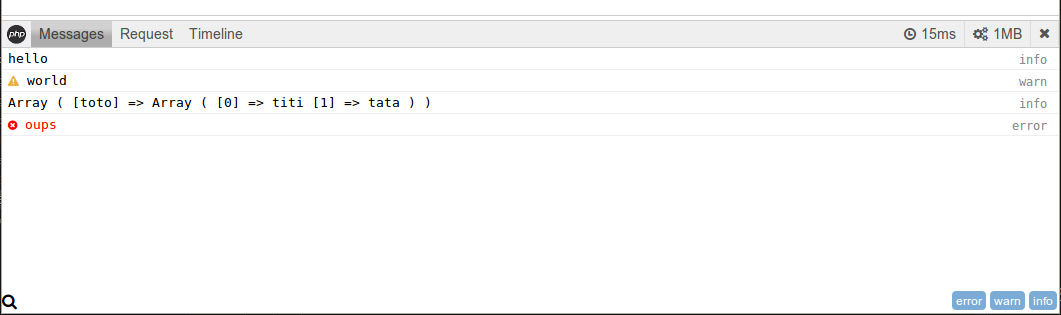
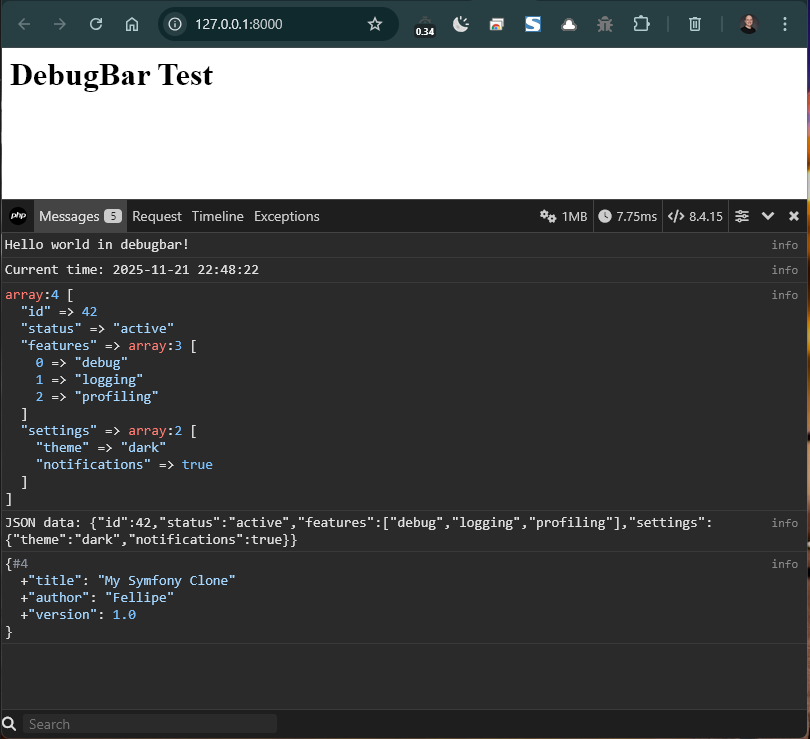
    The next tool is the PHP Debug Bar, that displays a debug bar in the browser with information from PHP.

    Installation

    ./composer require --dev php-debugbar/php-debugbar

    Usage with Composer

    <?php
    
    require 'vendor/autoload.php';
    use DebugBar\StandardDebugBar;
    
    $time = new DateTime();
    $data = [
            'id' => 42,
            'status' => 'active',
            'features' => ['debug', 'logging', 'profiling'],
            'settings' => [
                    'theme' => 'dark',
                    'notifications' => true
            ]
    ];
    
    $dataJson = json_encode($data);
    
    $object = new stdClass();
    $object->title = "My Symfony Clone";
    $object->author = "Fellipe";
    $object->version = 1.0;
    
    $debugbar = new StandardDebugBar();
    $debugbarRenderer = $debugbar->getJavascriptRenderer();
    
    // --- MESSAGES ---
    $debugbar["messages"]->addMessage("Hello world in debugbar!");
    $debugbar["messages"]->addMessage("Current time: " . $time->format("Y-m-d H:i:s"));
    $debugbar["messages"]->addMessage($data);
    $debugbar["messages"]->addMessage("JSON data: " . $dataJson);
    $debugbar["messages"]->addMessage($object);
    $debugbar["time"]->addMeasure("Script started", 0, microtime(true));
    
    ?>
    <html>
    <head>
        <?php echo $debugbarRenderer->renderHead(); ?>
    </head>
    <body>
    
    <h1>DebugBar Test</h1>
    
    <?php echo $debugbarRenderer->render(); ?>
    
    </body>
    </html>
    

    Resources

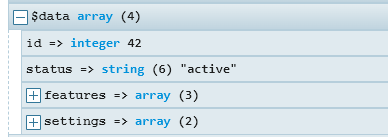
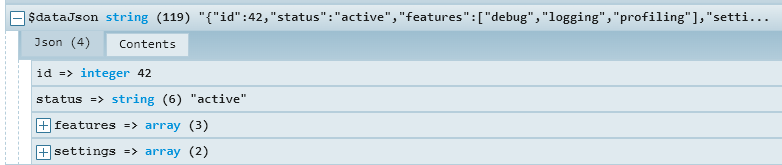
    • Search – This feature let you to fint values through complex data with ease.
    • Dump Data – you can unfold and explore instantly arrays, jsons, php objects, etc.

    PHP Debug Bar have a lot of other nice features, you can see all them here: https://php-debugbar.com/

    Conclusion

    Both are useful tools for debugging. While Kint generates the appropriate code to access data, the PHP Debug Bar seems to make debugging easier with its toolbar.

    Keep in mind that both have more advanced features that weren’t covered here.
    So, which one do you prefer? Try them out and decide for yourself!

  • Interface Segregation Principle

    Interfaces let you write code that depends on abstractions, not on concrete classes.
    When you programming this way, your code becomes more flexible, easier to test, easier to replace, and less dependent on specific implementations.

    Let’s see it in some exemples below:

    //Bad :-( 
    //Programming to a concrete class with tightly coupled code
    class MySqlDatabase {
        public function connect() {
            echo "Connected to MySQL";
        }
    }
    
    class UserService {
        private MySqlDatabase $db;
    
        public function __construct() {
            $this->db = new MySqlDatabase(); // tightly coupled
        }
    
        public function loadUser() {
            $this->db->connect();
        }
    }
    
    //Good :-)
    //Define an interface and have decoupled code, like Lego bricks!
    interface DatabaseConnection {
        public function connect();
    }
    
    //Create multiple implementations
    class MySqlDatabase implements DatabaseConnection {
        public function connect() {
            echo "Connected to MySQL";
        }
    }
    
    class PostgresDatabase implements DatabaseConnection {
        public function connect() {
            echo "Connected to PostgreSQL";
        }
    }
    
    //Use only the interface inside your main class
    class UserService {
        private DatabaseConnection $db;
    
        // Any database that implements the interface can be injected
        public function __construct(DatabaseConnection $db) {
            $this->db = $db;
        }
    
        public function loadUser() {
            $this->db->connect();
        }
    }
    
    //Choose the implementation at runtime
    $service = new UserService(new PostgresDatabase()); //Postgres: I Choose You!
    $service->loadUser();
    

    Sometimes it isn’t always clear how to properly segregate your interface or to predict future changes;

    So, if in the future your interface becomes too bloated, don’t hesitate to divide it into smaller and more focused sections, each representing a single responsibility.

    When designing interfaces, you should always strive to be as precise as possible; since they describe what the parts of your system are capable of doing, the clearer that description is, the easier it will be to build, update, and maintain your software.

  • Composing Objects Principle

    When a subclass inherits from a super class, the subclass will gain knowledge and access to all of the super classes attributes and methods as long as their access modifiers are not private. 

    This means that if you have multiple levels of inheritance, a subclass at the bottom of the inheritance tree can potentially have a way to access attributes and behaviors of all the super classes. 

    It’s “bad” not because inheritance is wrong, but because deep or excessive inheritance creates several structural problems in software design.

    So, what can we do to avoid this? 

    Composing Objects Principle

    You can use the composing objects principle to gain a high amount of code reuse without using inheritance. This principle states that classes should achieve code reuse through aggregation rather than inheritance. 

    Design patterns, such as the composite design pattern and decorator design pattern use this design principle. 

    Composing objects does not force you to try and find commonalities between two classes, and couple them together like with inheritance. Instead, you’re able to design classes that can work together without having to share anything between them. This flexibility will also help you if the system requirements change.

    To clarify, let’s look at a code snippet below, comparing both modes.

    <?php
    //Inheritance way
    class Logger {
        public function log(string $message): void {
            echo "[LOG] " . $message . "<br>";
        }
    }
    
    class UserService extends Logger {
        public function createUser(string $name): void {
            $this->log("Creating user: {$name}");
            echo "User {$name} created.<br>";
        }
    }
    
    <?php
    //Composite way
    class Logger {
        public function log(string $message): void {
            echo "[LOG] " . $message . "<br>";
        }
    }
    
    class UserService {
        private Logger $logger;
    
        public function __construct(Logger $logger) {
            $this->logger = $logger;
        }
    
        public function createUser(string $name): void {
            $this->logger->log("Creating user: {$name}");
            echo "User {$name} created.<br>";
        }
    }
    

    Dynamic Behavior

    In addition to less coupling, composition does allow dynamic behavior at runtime, because you can inject different objects into a class:

    $userService = new UserService(new FileLogger());
    // later…
    $userService->setLogger(new DatabaseLogger());
    

    What you can’t do with inheritance, once this relationship is fixed in the source code:

    class UserService extends Logger {}

    Now, it’s not to say that inheritance should never be used. Composing objects in inheritance both have their place. Composing will give you better flexibility and less coupling while maintaining reusability, but that doesn’t mean it should always be used over inheritance. 

    You need to examine the needs of your system in order to determine which design principle is appropriate. 

    • Do you have a set of related classes or unrelated classes? 
    • What is a common behavior between them? 
    • Do you need specialized classes to handle specific cases or do you simply need a different implementation of the same behavior? 

    This are the different kinds of questions that you’ll need to ask yourself when designing your software systems.